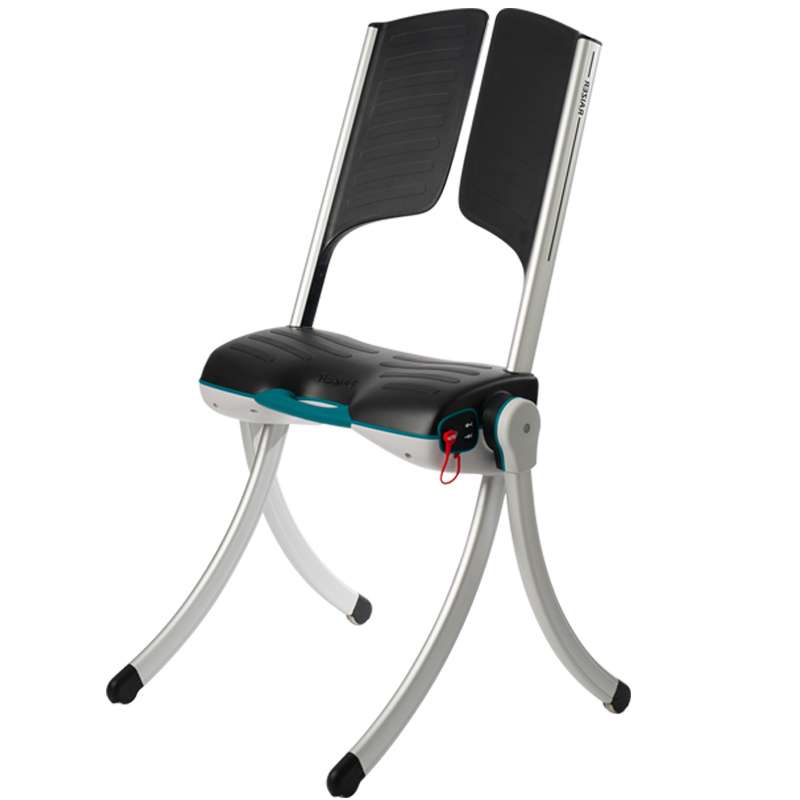
The Raizer lifting chair is a particularly useful falls assist that helps fallen people get back to a seated or standing position. But do you know how to use the Raizer?
Here are some step-by-step instructions to help you when using the Raizer lifting chair.
Before you start
Before you get started with any moving or lifting, there are a few things you need to check:
- Is the person conscious?
- Are they injured?
- Do they need help standing up?
These might seem like silly questions, but you always need to check these things to avoid any further injury or unnecessary fuss. If you need to provide any sort of first aid, then have a read of this blog post.
Step One
The first thing you want to do is make sure the person is on their back. If they are alright to turn themselves over then great — if not, you might need to assist them.
You could use a slide sheet or something similar to help manoeuvre the person on to their back. Bear in mind that the person should have been risk assessed for injuries at this point, so they should be fine to be moved around.
It’s important to make the person as comfortable as possible, so you could put a pillow or cushion beneath their head to support them.
Step Two
You then need to get the main unit of the Raizer beneath the person’s knees. To do this, you can get them to bend their knees up to give you better access.
Simply slide the unit underneath their knees and put it as close to their bottom as possible. If the person is struggling to keep their knees up, you can support them with cushions and pillows.
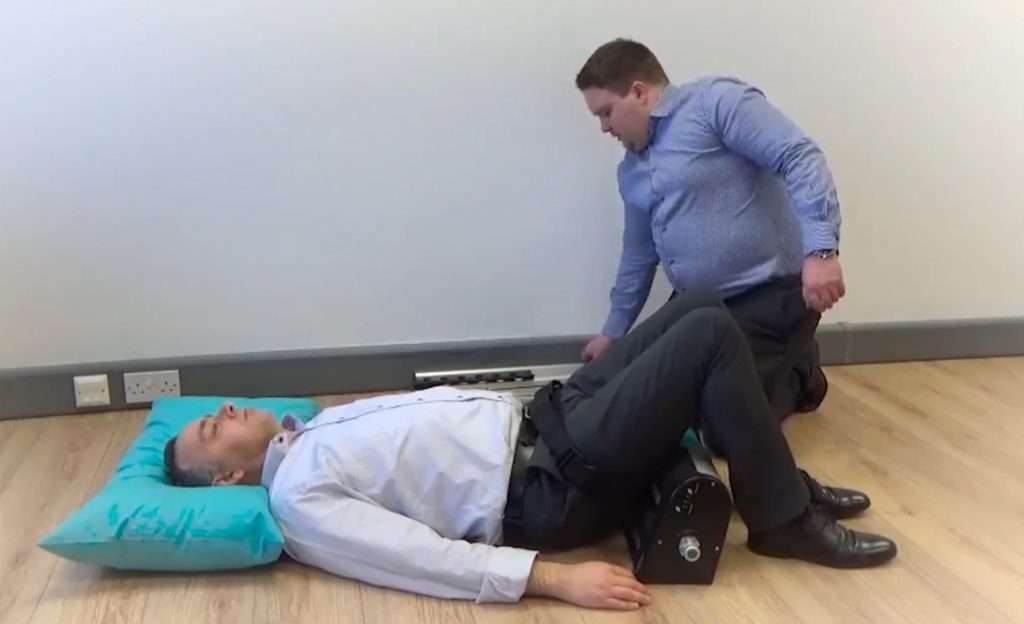
After that, you need to fasten the lap belt across the person to keep them secure and safe during the lift. Fasten it across their hips and leave it reasonably loose to begin with.
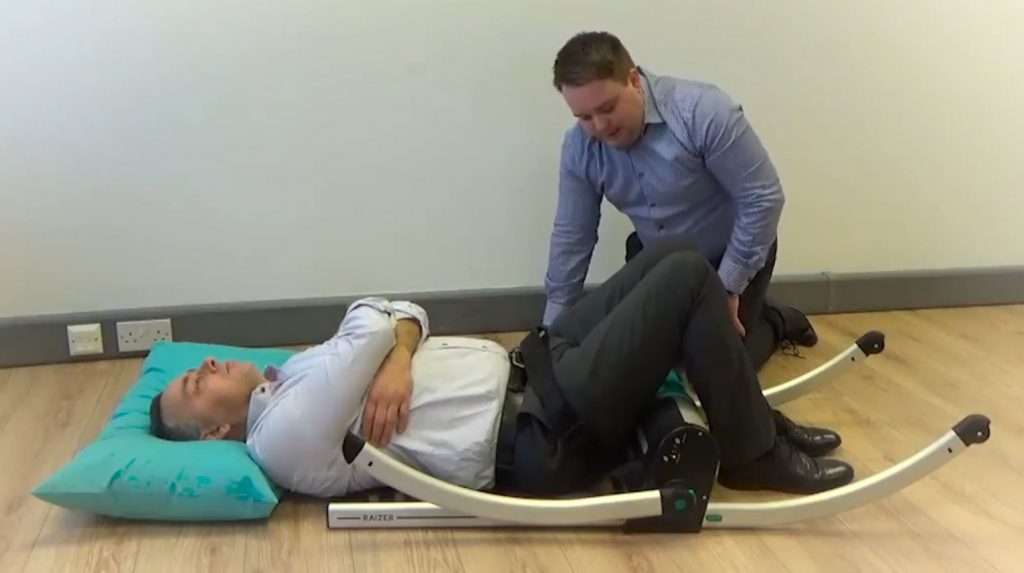
Step Three
The backrest and leg pieces fit into the left and right side of the seat unit. They are all the same, so they fit into any part of the seat unit.
Sound indicators have also been added so the operator can instantly tell when the device is correctly assembled and ready to lift.
Step Four
Starting with the backrest pieces (the ones with the big black backrest section attached them), line it up with top side of the unit. Move the person’s arm across their body, and gently roll them to lift up their shoulder blade.
You can then push the backrest piece into the socket of the unit until it clicks into place.
Now grab the wheeled leg of the Raizer and click that into the socket on the bottom of the unit. You should now have a backrest piece and a wheeled leg piece fitted to one side of the unit.
Step Five
Repeat step four on the other side of the Raizer lifting chair unit. You should now have a complete backrest and two wheeled legs securely attached.
Step Six
Then take the motor arm (this looks like another chair leg but without the wheel at the end) and slot it on to the cog on the end of the Raizer unit. You may need to slowly slide it on and gently rotate it to find the slot for it to click into place.
Make sure you hear the leg click when it attaches. Try and get it slotted on as close as possible to the ground to avoid any risk of entrapment.
Step Seven
When both motor arms are properly attached and securely into place, the unit should automatically turn on with green lights showing on either side. One light signifies that the unit is charged, the other is a green tick that shows that the chair is properly assembled and ready to be used.
Step Eight
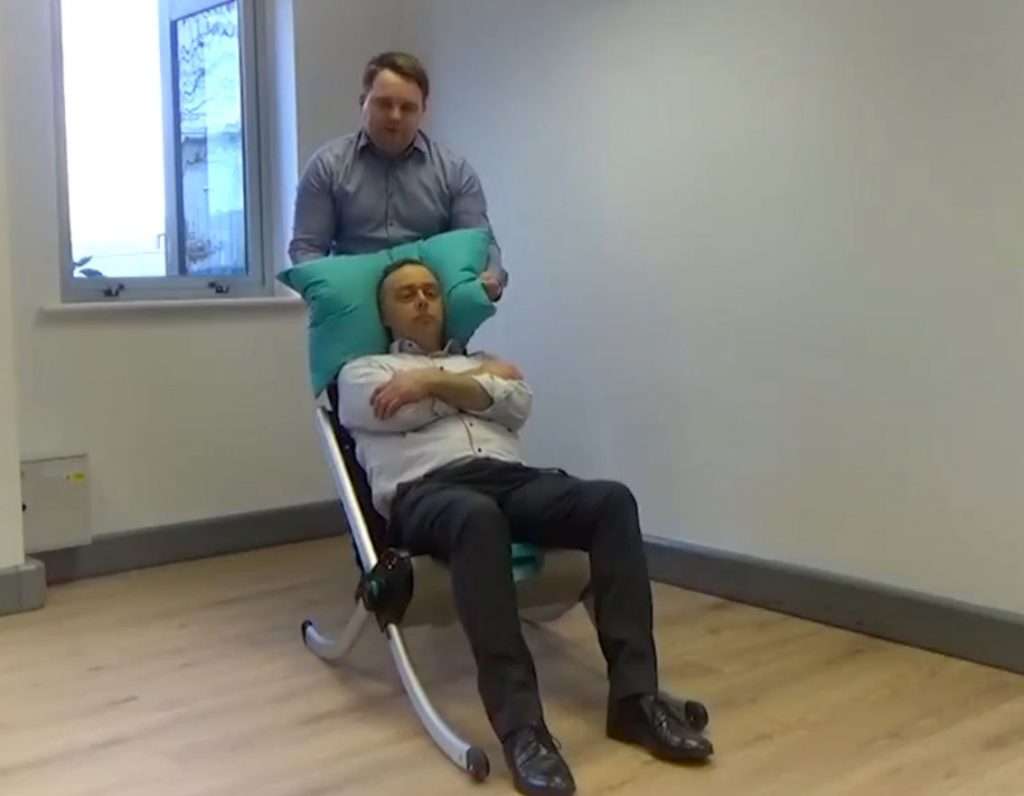
Make sure that the person’s feet aren’t caught under the curve of the chair leg. Also ensure that their arms are crossed to keep them out of the way and to avoid entrapment.
If the Raizer will not lift, then the emergency stop button may be pushed in. To release the button, twist it clockwise and it will pop back out again.
Step Nine
Tighten the lap belt to make sure that the person is completely secure for lifting.
You can use either the up and down buttons on the side of the Raizer unit or the optional remote hand control to being moving the Raizer. We find that using the remote control is usually better because it allows you to support the person’s head as the chair lifts up.
Step Ten
The Raizer chair should now be lifting the person to a seated position. If you find that the person is a bit shorter and their feet are being lifted from the ground, you can get them to shuffle down a bit to stay secure and grounded.
You can keep lifting the person to a standing position if desired. Undo the lap belt and ask the person to put one hand on either side of their hips if possible. This will help to give them something to propel themselves up to a standing position.
Summary
This ten-step guide on how to use the Raizer lifting chair should help you get people back to their feet with dignity and ease. But if you want to see the Raizer in action, take a look at this page.
Give us a call on 01423 799960 to arrange a free demonstration, or book a free, no-obligation assessment.
Graeme has worked alongside the public sector for much of his working life, helping departments improve efficiencies and deliver on projects. In his role at Vivid.Care, Graeme used his experience to tackle some of the most challenging issues in the healthcare sector, from falls through to winter pressures. He was also a guest speaker and a number of different conferences, including at the Falls Prevention Summit in London.