Introduction
If you are considering purchasing the Raizer falls lifting device — either the Raizer II electric version or the Raizer M manual version — you’ve probably also been wondering about the drawbacks of these products. After all, every product on the market has some disadvantages, no matter what market or product type you are looking at — from garden chairs to laptops, every item you purchase has some downside.
At Vivid Care, one of our company values is ‘Honesty’. That’s why we wanted you to hear of any potential issues of the Raizer falls lifting devices from us, before hearing it from anyone else. And that’s why we’ve written this article, where we’ll go through each of the potential problems in turn, and tell you exactly what might happen and what we can do about it.
So, here are the eight possible concerns we’ll discuss:
- Raizers are for uninjured fallers, not injured ones
- Weight of the Raizer
- Weight limit and seat width of the Raizer
- Lifting when the fallen person isn’t laid on their back
- Side transfers after the lift is complete
- Entrapment risk
- You can’t submerge the product in water for cleaning
- Space needed (Raizer M only)
Jump straight to:
- Raizer Problems & Solutions Summary
- Raizers are for uninjured fallers, not injured ones
- The weight of the Raizer
- Weight limit and seat width of the Raizer
- Lifting when the fallen person isn’t laid on their back
- Side transfers after the lift is complete
- Entrapment risk
- You can’t submerge the product in water for cleaning
- Space needed (Raizer M only)
- A few final words…
Raizer Problems & Solutions Summary
For those who want a quick summary of potential problems with the Raizer falls devices, and our suggested solutions or comments, please check out this table!
For more information and in-depth comments and suggestions, read the rest of this article below.
1. Raizers are for uninjured fallers, not injured ones
The potential problem
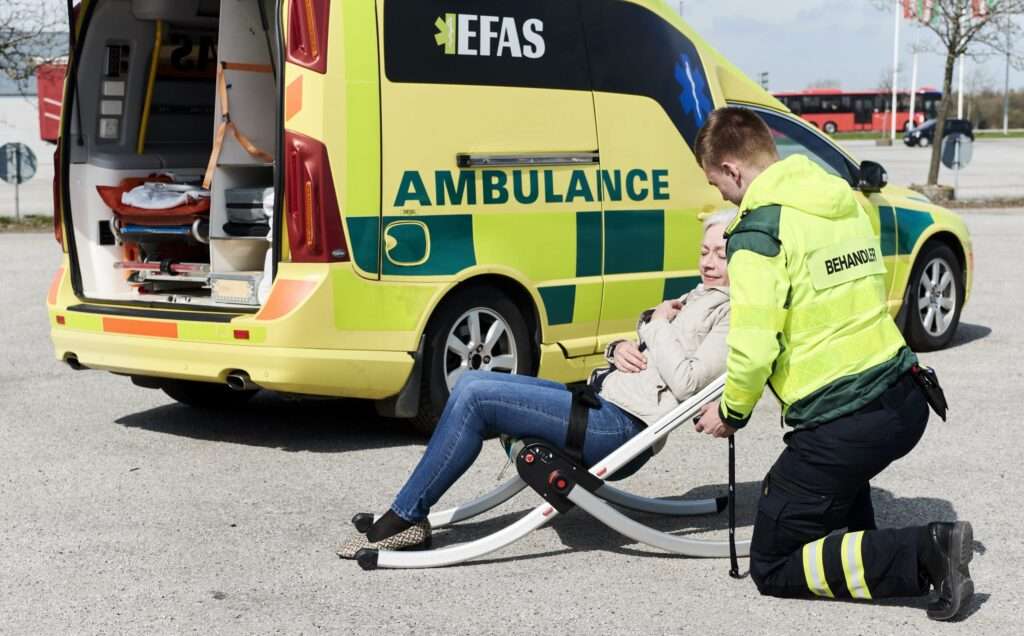
Like many falls lifting products or even lifting techniques, such as the Winncare Mangar lifting cushions, with the Raizer you need to do a risk assessment before lifting the patient. If there are any suspected broken bones or other injuries, it’s not wise to use the Raizer to lift the patient, and it’s recommended to use a stretcher or a supine lifting device, such as the HoverJack or FloJac.
Suggested solutions
In brief, here’s the recommendations when you come across this issue:
- Always carry out a risk assessment before starting to use the Raizer. There are some tools to help with this, such as the iSTUMBLE method, which includes steps to check to help ensure the patient can be lifted safely.
- If the user is injured and your risk assessment indicates it might not be safe to use the Raizer, use another device or technique to lift the user from the floor.
2. The weight of the Raizer
What’s the issue?
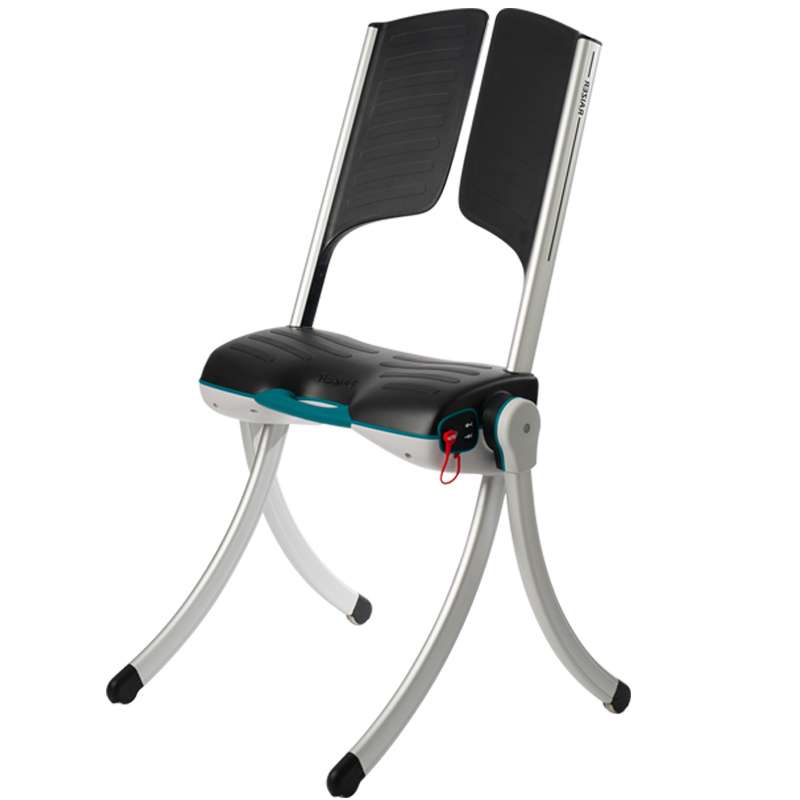
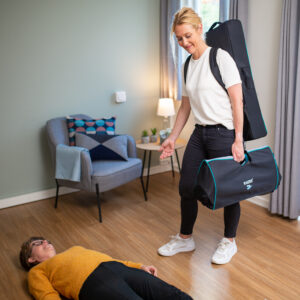
Whilst the legs and backrest sections of the Raizer and all the accessories are very lightweight, the seat unit comes in at 9.2 kg (20.3 lbs) for the Raizer II and 7.2kg (15.9 lbs) for the Raizer M, and some users may find this a bit heavy to transport for longer distances.
The devices have been designed to be as lightweight as possible without compromising on durability and safety, and the reason for the seat unit being heavier is because it contains the inner workings of the product — ie. The motor and battery for the Raizer II electric model, and the gearing for the manual action of the Raizer M.
The Raizer lifting device seat units are the heaviest part of the product
What has been done about the weight of the Raizer devices, and what else can be done to help?
There are a few improvements that have been worked on to help with regards to the weight of the Raizer:
- The previous version of the Raizer II, the Raizer I, had a seat unit which weighed 9kg — so despite all the additional features that the Raizer II brings over the original, the design engineers have done all they can to keep the weight as low as possible.
- The backrest sections, leg pieces, and other parts (with a total weight of just 4.9kg for the Raizer II and 5.2kg for the Raizer M) all fit neatly into the supplied backrest. This leaves your hands free for moving the seat unit.
- The bottom section of the Raizer seat unit has now been cleverly sculptured to enable it to be held closely to your body when lifting it, which makes it so much easier to lift and carry. The unit also includes an easy-to-grasp handle with plenty of grip, which has been designed in conjunction with an ergonomics specialist.
- Lastly (and most importantly!), a foldable trolley is available as an accessory to the Raizer devices. This carries both the seat unit and the backrest, taking away any strain of moving the Raizer from place to place, especially when moving it over long distances. The Raizer can be kept on this trolley when not in use, for quick and easy deployment wherever and whenever it is required.
So in short, if you have any concerns about this aspect of the Raizer, firstly rest assured that it’s been made as easy to lift as possible, and secondly consider investing in a Raizer trolley!
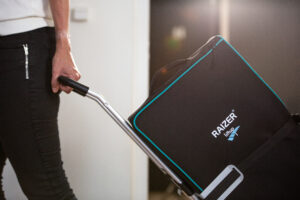
The Raizer trolley makes moving the Raizer a breeze
3. Weight limit and seat width of the Raizer
When is the Raizer’s safe working load an issue?
The safe working load for both the Raizer II and the Raizer M is 150 kg (330.7 lbs, which is 23 stone and 8.69 pounds). This is a generous weight limit, but even so there are those who are heavier than this. Quite aside from this, the Raizer seat width is about 55cm/22 inches, so if the user’s weight distribution is centred around the hip area, then the Raizer may not be suitable in this instance. It’s worth noting that this is a rare occurrence, however, and we mention this in the interest of full disclosure.
What happens when the fallen person is over the safe working load?
It’s important to use another lifting device (typically the inflatable types) if the user is over the weight limit, such as the Mangar lifting cushions, or HoverJack/Flojak supine lifting mats, as these usually have a weight limit of over 400kg.
The good news is that if you do try to lift someone over the weight limit of the Raizer II, there are safety features built into the product to ensure the user isn’t injured and the device isn’t damaged. Here’s what the user manual says:
In order to avoid damage to the device in the event of overload (max. 150 kg/330.7 lbs), the Raizer is fitted with an overload cutout, which when triggered halts the lifting chair and issues an audible alarm. In the event of overload, run the chair down to the horizontal position/floor level. For safety reasons the Raizer is designed to sink slowly under heavy loads which is completely normal. This feature has been introduced in order to avoid mechanical breakage in the event of overload.
4. Lifting when the fallen person isn’t laid on their back
The issue
The Raizer devices (and virtually all falls lifting products for that matter) are designed to lift someone from the lying down position, and the seat unit slides under the person’s legs when they are lying on their back. But what happens when they aren’t on their back?
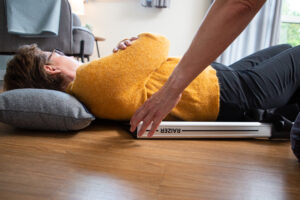
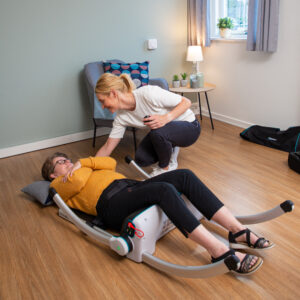
Like many falls lifting products, the fallen person needs to be positioned on their back in order to use the Raizer.
Using the Raizer when the fallen person is lying on their side
As a carer, it’s important to be mindful and gentle when helping a patient move from one position to another. Here’s a step-by-step guide on how to move a patient from lying on their side to lying on their back. Obviously it’s important to ensure they aren’t injured before this.
- Start by kneeling close to the patient and explaining what you’re going to do.
- Ask the patient if they are able to assist you — it will be much easier if they can help
- Gently roll the patient, keeping their knees bent and supporting their upper body with your arm. Depending on the space each side of them and your and their personal preferences, you can either push them from their front onto their back, or pull them from behind them. Most people find it easier to push than pull, especially as you can use your body weight to help, as detailed in this video from renowned manual handling specialist Simon Love, back in 2014: https://www.vivid.care/our-resources/educational-videos/power-leaning-simon-love/
- Finally, check that the patient is comfortable (maybe add a pillow under their head if you have one to hand!) before starting to use the Raizer as detailed in this article: https://www.vivid.care/advice-tips/how-to-use-the-raizer-2-lifting-chair/
Using the Raizer when the fallen person is in a sitting position
Sometimes the person who has fallen will be in a seated position, for example if they have slid from a chair, or slumped against a wall during a fall.
Moving a fallen patient from a sitting position to a lying down position requires care and caution. Start by standing close to the patient, explaining what needs to happen, and checking they are feeling well enough to carry this out. If they can prop themselves up and they are leaning against a movable item such as a chair, ask them to sit up whilst you carefully move the item away. Then, ensuring there is enough space for the patient to lie down, carefully support them as they lie back. It’s often good to put your hand or a pillow behind their head as they lie down to stop them hitting anything and causing injury.
If they are leaning against an object that can’t be moved, such as a wall or fixed piece of furniture, you may need to encourage or help them to shuffle around in a quarter-circle so they are then able to lie back, parallel to the wall or furniture. If they can shuffle away from the object whilst doing this, the additional space between them and the object will help you use the Raizer more efficiently.
Remember to always move slowly and steadily, and listen to the patient’s cues.
Once the person is in the lying down position, the Raizer can then be used in the normal way, as shown in our product videos (see https://www.vivid.care/our-resources/educational-videos/how-to-use-raizer-m/ for the Raizer M, and https://www.vivid.care/our-resources/educational-videos/raizer-lifting-chair-training/ for the Raizer II).
Remember, every patient is unique, so always communicate with them and adjust your approach based on their specific needs and abilities.
5. Side transfers after the lift is complete
The problem
It’s rare that this is an issue, but some users like to carry out a side transfer to move from the falls lifting device to a wheelchair or bed, using a transfer board. The Raizer is typically used for forward-facing transfers after the lift, as the seat can be brought to a suitable height for the user, and they can then stand either unaided or with the support of a walking aid or carer.
Transferring from the side of the Raizer, although not impossible, can be a little tricky due to the short distance between the front of the seat and the backrest section, and the bucketed design of the seat.
Due to the bucketed design and backrest configuration, the Raizer isn’t ideal for side transfers.
The solution
In short: Either the user needs to try and transfer in a different way, or carers can do some testing and risk assessments with a transfer board when the user hasn’t fallen and the situation is calm and safe. Every person and situation is unique, so it stands to reason that what’s possible for one patient may not be possible for others.
6. Entrapment risk
Can the Raizer trap pets or children?
We’ve seen posts on the internet that talk about the risk of pets or children being trapped during the use of a Raizer lifting chair. If we’re honest, we’ve been slightly amused by this, especially because in almost a decade of thousands of Raizer devices being used, we have never heard of any incident in this regard, but in the interest of full openness, we’ve added it to the list here as a potential issue!
Can a user have their limb(s) trapped?
All our training and the Raizer user manuals include a section on this, as because the Raizer lifts off the ground via four lifting legs, this does theoretically introduce an entrapment risk because of the space underneath the seat unit and legs.
How to ensure there is no entrapment when using the Raizer
Like many of the potential problems mentioned in this article, the solutions are simple!
- The carer/person using the Raizer just needs to ensure any pets are out of the room or shut in a different room.
- Children (if present, which is rare anyway!) need to stand back, be told to keep clear, be given something to distract them, or ideally be looked after by someone else elsewhere. If there are children who come to the location, ensure the Raizer is out of the way and out of reach when not in use, and certainly don’t allow them to play with it!
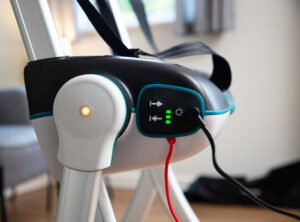
- The Raizer II only moves when you have the remote button pressed down, and the Raizer M only moves when you wind the crank handle. So if any entrapment risk presents itself, you can stop immediately with no delay! What’s more, the Raizer II has an emergency stop on the side.
- Part of the steps for using the Raizer is to check the person’s feet are within the legs and clear of them before beginning the lift. This is a very quick and easy check to carry out, and is a very obvious action for anyone using the Raizer. If you are concerned about the person’s arms, just ask them to fold them, or ask them to hold their own shoulders during the lift (ie. Their left hand should rest on their right shoulder, and their right hand should be placed on their left shoulder.
Before lifting, ask the patient to hold their shoulders and keep their legs together.
7. You can’t submerge the product in water for cleaning
The issue
The Raizer II user manual says, “NEVER use a high-pressure jet or running water to rinse the chair and NEVER immerse it in water, as this can damage the product”.
Many, if not all, falls lifting products can’t be submerged in water either, so this is not unusual! For example, whilst the cushion devices themselves can be submerged in water, the pumps used to inflate them can’t be.
How to clean the Raizer instead
You can use a damp cloth to clean the Raizer, or if you want to perform a thorough clean, you can also use:
- Hydrogen Peroxide Aq. 1% (max.) (diluted hydrogen peroxide)
- Ethanol based products 70-85 v/v%. alcohol
- Soap solutions PH value max. 9
The transportation seat unit cover and backpack may be cleaned with a well-wrung cloth or in the washing machine at max. 30°C. You can disinfect the bags by using alcohol-based disinfectants at a concentration of 70—85 v/v%.
It’s good to note that the Raizer II is now IP 52 rated (protected from limited dust ingress; protected from water spray), which is a step forward from the original powered Raizer.
Another option is to use the Raizer disposable hygiene covers, which just fasten around the seat unit to keep it clean, and can be thrown away after the lift.

Disposable hygiene covers are available to keep the Raizer seat unit clean.
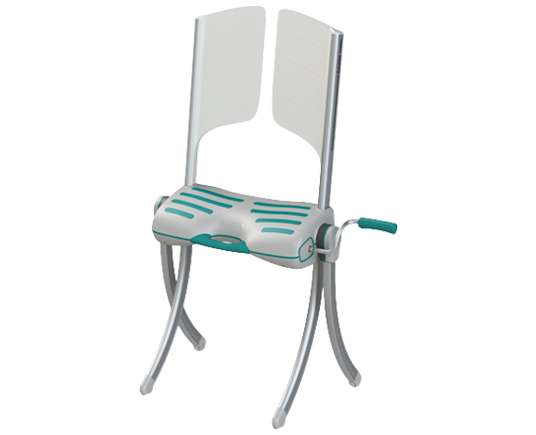
8. Space needed (Raizer M only)
What’s the issue?
The Raizer II can be used in very small spaces, as it is compact, and can be put together around the fallen person by leaning over them if there isn’t enough access space around them (for example, if they have fallen over close to a wall).
We have proved this in our family, as my grandmother fell over in a very tight space next to the bath. My brother, who lived along the road at that stage, was able to go round there and lift her up with the Raizer safely in just minutes, despite the lack of space! This was a lot less stress than calling the paramedics, was sorted in just minutes, and saved an ambulance callout, saving cost and time for the already-stretched Yorkshire Ambulance Service!
However, as the Raizer M uses a crank handle instead of a remote control and battery like the Raizer II, you do have to have a certain amount of space on one side of the unit to allow the lift to take place.
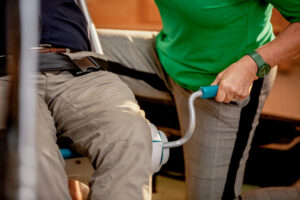
You need a certain amount of space on one side of the Raizer M, to allow enough room to wind the handle.
What’s the solution?
The crank handle can be inserted on either side of the Raizer M, so it’s a rare situation when there’s no space either side of the person that’s fallen!
If this does happen, however, you will need to shuffle the person to where there is more space, or perhaps use a slide sheet to move them to a more accessible position.
If your building has lots of very narrow spaces or corridors where falling happens, then maybe consider purchasing the Raizer II lifting device instead of the Raizer M, as this doesn’t need much space to operate it.
A few final words…
Hopefully as you’ve seen, there are very few disadvantages to the Raizer II and Raizer M emergency lifting chairs, and in the interest of full transparency, we’ve added every single problem we can think of here, even if we’ve never heard of them happening, or the risk is somewhat tenuous!
However, if you have any other concerns or questions about the Raizer devices, please do get in touch and we’ll be glad to help.
Tristan has been in the healthcare industry for many years, and is a well-known face in the care equipment market. He has a particular interest in specialist seating, and is the author of the highly-acclaimed 88 page "The Healthcare Professional’s Guide to Specialist Seating Assessments" book. Tristan has also been involved in the research and development of many different postural and pressure advancements in chairs over the years.